Showing posts with label Blogger Tips. Show all posts

2011/12/30

How to insert ads into Blogger XML code

First you need to parse your code into an XML format Blogger can  understand. You can simply use the HTML code you got from your affiliate program.

Parse the code here:

http://www.blogcrowds.com/resources/parse_html.php

Copy the parsed code.

That’s basically it. You can look for patterns in the HTML code where you want to put your ad. Make sure to check for <div> endings and test. Always backup.

To post the add in the body of your post read on.

On your blogger account, go and edit the HTML code (I don’t have to tell you to make a backup of it first before you edit the code).

Go to Layout – Edit HTML. Make sure to check “Expand Widget Templates” option.

Look for this code which represents a single post:
<p><data:post.body/></p>

Then just paste the parsed ad code before or after that code. Save and see how it looks like. You can place your code between some <div> tags if you want to design it further (eg: center, left flush, etc).

2011/12/09

How to create and change blog icon (favicon) in Blogger

Do you agree that it is boring to keep you blog icon unchanging for such a long time? Is your blog unique comparing to millions of other blogs. Recently, I have changed my blog icon. Is it different from other blogs. Yes, it is. Today I will show you how to make your blog different from others by creating and changing your blog icon (favicon). You can do this by following these simple steps:


1. Create your blog icon

There are many ways to create an icon for your blog both online and offline. For convenience, I use an online banner creator service called bannersnack to create my blog icon. The banner size should be 20x20. However, it is very hard for you to work on such a small size. I recommend you to create an icon size of 200x200. After publishing your icon, you should take a snap of your icon, trim unnecessary parts, then resize it to 20x20.


2. Upload your icon. 

You can upload your icon to any image hosting services such as imageshack, photobucket. However, I recommend you to host it right on blogger like this icon.. Just follow this simple steps:


  • Create "a new post"

  • Select "insert image" to upload the icon

  • Finally, copy the image url


3. Add code to your blog html template


  • Dashboard>Design>Edit HTML

  • Search for this tag

  • Put this code right above the tag


    <link href="%3Cb%3Eurl%20of%20your%20icon%3C/b%3E" rel="shortcut icon">


  • Remember to replace the phrase url of your icon

  • Done!


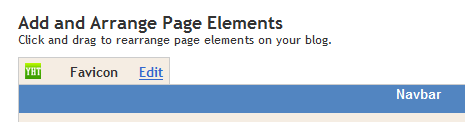
Note:  You can change your blog Favicon by click on edit, then upload your blog icon, like this:


Favicon is only used to distinguish your blogs. It does not change your blog icon.


Thanks for visiting our blog. Please leave your comment and share with us

How To Show Related Posts in Blogger with Published Date

Do you want to increase your blog pageviews from your unique visitors by showing them the related posts ( related articles) in the same category or label? Today I will show you the way to show related posts in your blogger that really on my blogger. I have tried several ways to show the related posts on my blog, however, it did not work as I expected. Out of them, this method is really WORK on my blog, so I decide to share it to you. Let's start.